
AutoBroadcast | In-Depth Guide - Terraria 2018
AutoBroadcast is a TShock Terraria Plugin that allows you to Automatically broadcast messages. There are many triggers that can cause a broadcast which makes this a very useful plugin. You can have your message automatically broadcast to all user based on a predetermined time interval, or use triggers, such as, something a user has said, or a region that a user has entered. If you follow this guide everything you can know about this plugin will become clear as day. Thanks for giving this article a read.
Listed Features:
- Automatically Broadcast an infinite number of messages or commands.
- Broadcast an infinite number of lines.
- Choose which group to broadcast the message to.
- Choose what color to broadcast the message.
- Choose the interval between broadcasts.
Download link here: AutoBroadcast TShock Plugin
AutoBroadcast's Author, Zaicon's TShock user panel
You should read these guides first:
How to give yourself SuperAdmin Privileges on TShock Terraria
How to install Tshock Terraria Plugins
TShock Group Management Guide
TShock Permission List
How to access AutoBroadcastConfig.json
After this plugin is installed, it creates a config file located at "/tshock/AutoBroadcastConfig.json." To make any edits or broadcasts, you must do so in this file. To access this file, you can do so by connection to an FTP Client such as FileZilla, or by using our Game Server Management panel. If you would like to access your server file by an FTP Client, read our Knowledge Base guide: How to Use FileZilla with your GameServerKings Server. Using our Mangement panel:
- Click on "Game Services" and select your TShock Terraria server.
- From here, click on "File Manager"
- Within the file manager, click on the tshock folder, and then find the AutoBroadcastConfig.json folder
- Click the image that looks like the earth to download this file.
Once you have completed those steps, you will have downloaded your current AutoBroadcastConfig.json folder and can now edit it. Open your config file with any text editor such as notepad or notepad++ and you will be greeted with sample code. It should look something similar to this:
{
"Broadcasts": [ { "Name": "Example Broadcast", "Enabled": false, "Messages": [ "This is an example broadcast", "It will broadcast every 5 minutes", "Broadcasts can also execute commands", "/time noon" ], "ColorRGB": [ 255.0, 0.0, 0.0 ], "Interval": 300, "StartDelay": 60, "TriggerRegions": [], "RegionTrigger": "none", "Groups": [], "TriggerWords": [], "TriggerToWholeGroup": false } ]}
Code Breakdown
To give you a better understanding of this code, I will break down the information into a format that's easily understandable. If you have experience with plugin configuration, you may already understand this much and would wish to move forward. All this section will be explaining is how to read and understand this code in a way that will make it easier for someone who's new to server hosting to manipulate.
So, if you take a look at the code above, you can see it's segmented into four parts. "Broadcasts," information about the broadcast text, color, and trigger information. But really it's much more than that. When the game compiles this information to read, it will be breaking it down in a way that will make the whole code look like this: {"Broadcasts":[{broadcast text information[message],"color info":[RGB values],"Interval":rate,"StartDelay":delay,"TriggerRegions":[info],"RegionTrigger": "region info","Groups": [group info],"TriggerWords":[info],"TriggerToWholeGroup": true/false}]}
It seems like a lot of information! That's because it is. The syntax used just takes this string of information and breaks it apart into smaller groups. And you can see that each group has two parts, a variable, and it's value. Seen like this:"variable": "value","variable": "value"
Then, it's even further segmented into an array, or list, of values by using square brackets:
"variable": [ value1, value2, value3],
And all of this information is just as an array of values within the "Broadcasts":[] array. Therefore, all that is within the file can be broken down like this:
{ "Broadcasts":[ { data for message 1, data for message 2, data for message 3 } ]}
The rest of this guide will be breaking down the information shown further, using this syntax to create your message broadcasts.
How to set up a message
First, we can set up a basic message, something like, "Thank you for visiting the GameServerKing's official TShock Terraria server. If there's anything you need, you can contact us via live chat support on our home page. Enjoy your stay!" so, we must plug this into our code:
{
"Broadcasts": [ { "Name": "Welcome Broadcast", "Enabled": true, "Messages": [ "Thank you for visiting the GameServerKing's official TShock Terraria server.", "If there's anything you need, you can contact us via live chat support on our home page.", "Enjoy your stay!" ],...
So, let's break this down. Within Broadcasts, we've added one item to our list with the name, "Welcome Broadcast". We've set this to "Enabled": true, which means that this broadcast will broadcast as scripted. We've placed three messages within the "messages" list. This will display one message on three lines. We open the list by typing the bracket and then our text. So, ["Thank you for visiting the GameServerKing's officialTshockTerraira server.", new line, "If there's anything you need, you can contact us via live chat support on our home page.", new line, "Enjoy your stay!"] We then close the text list with a closing square bracket. It's very important that the last member of the list does not receive a comma after the quote ends, but all other members of the list do.
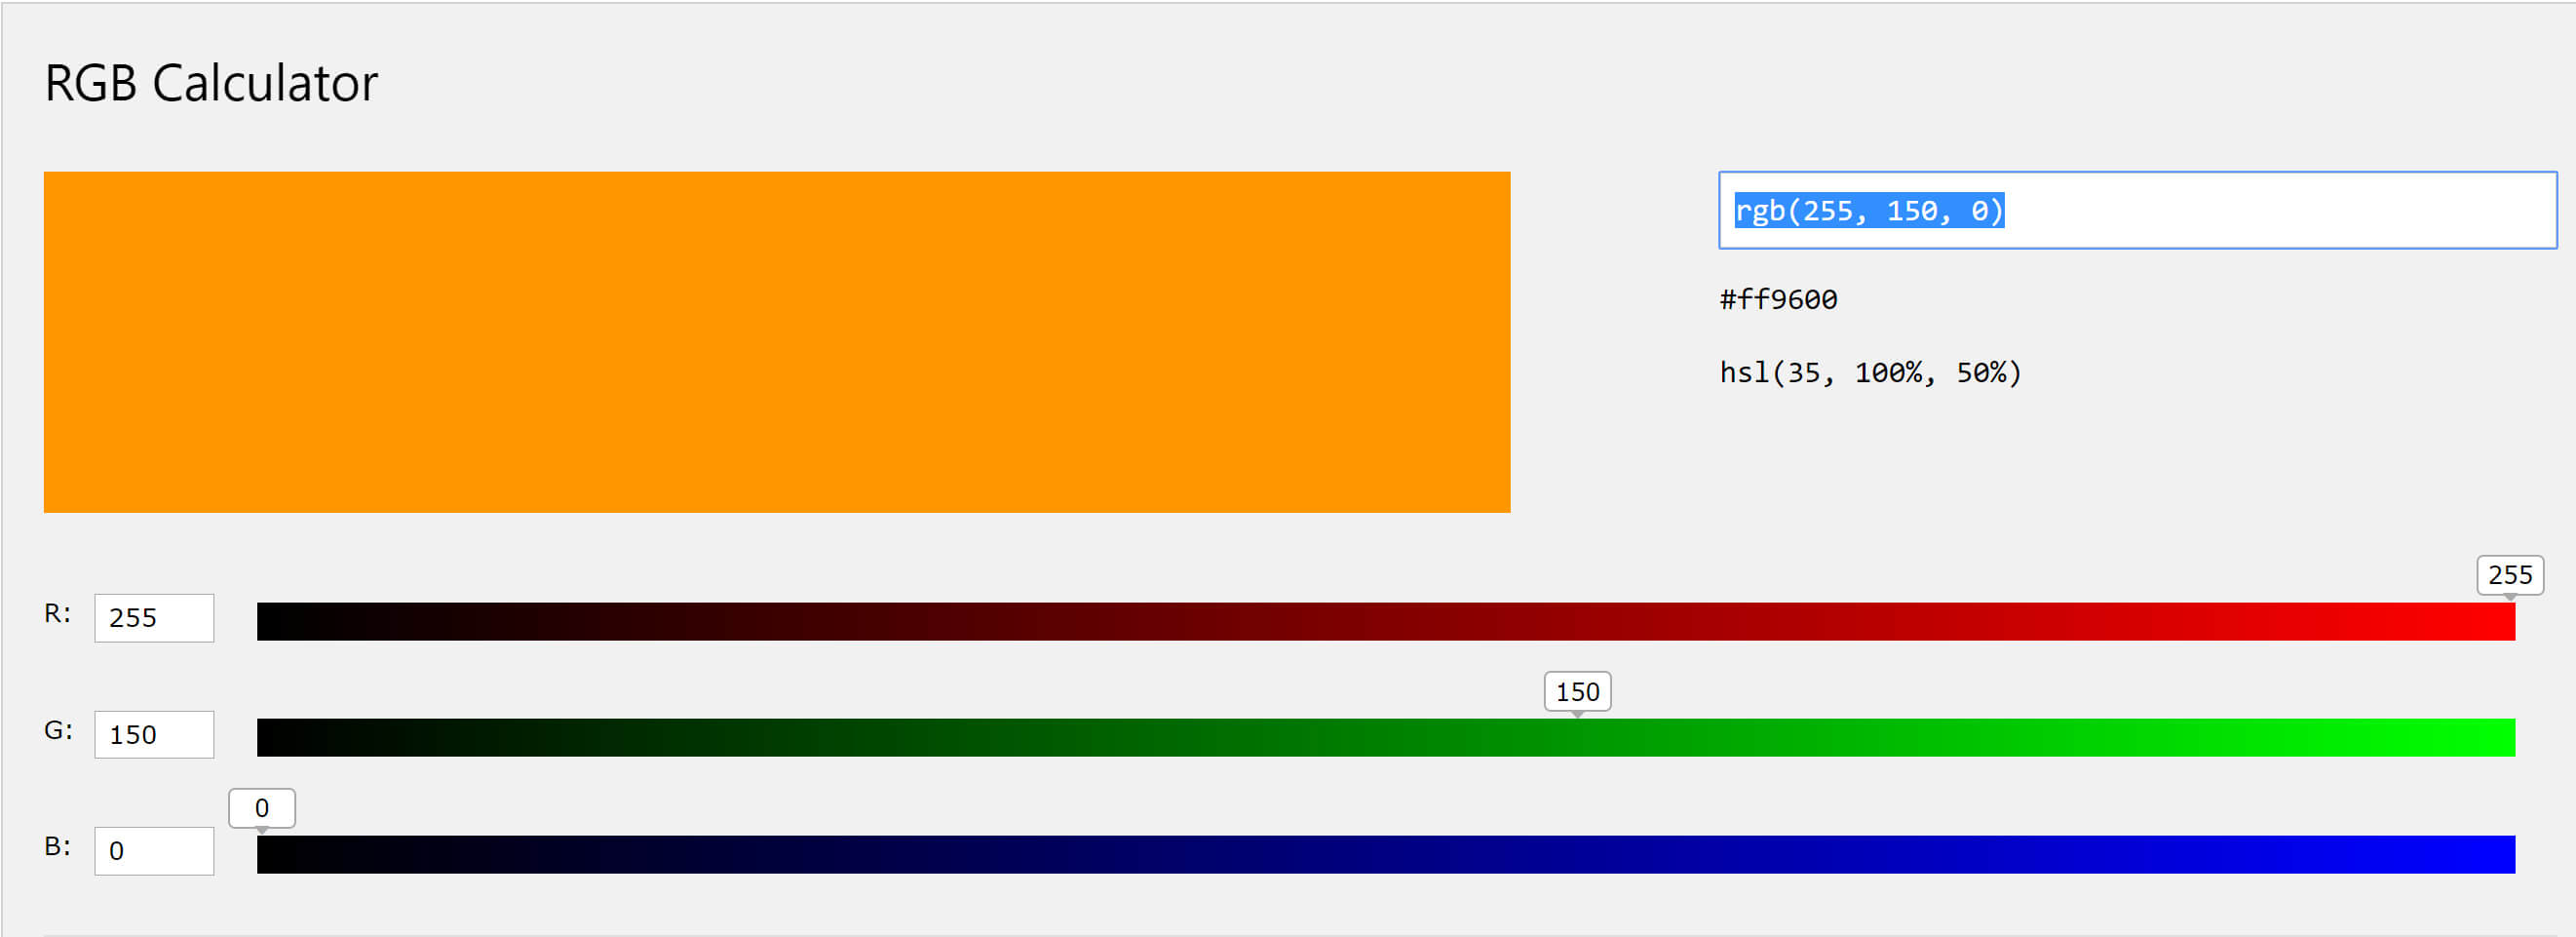
Next, we have color settings. We can change the color this message is written in by using RGB colors. An RGB color code is essentially three sets of values from 0-255, each representing Red, Green, or Blue, and the number setting the intensity from Black to that color. You can pick a color by adjusting the sliders on this page hosted by W3 Schools. As seen in this picture, I will do an orange color, which is made with this color value: RGB(255, 150, 0).
Now that we know the color of our text we wish to choose, we can change the color with the "ColorRGB" section of code.
   ...
     "ColorRGB": [
255.0, 150.0, 0.0 ],
...
And lastly, we have the final section, which is made up of many values, all of which will be explained in this table below.
Value |
Data Type |
Description |
| Interval | time in seconds | This value sets how often this message will be repeated. Set to 0 if you don't want your message to repeat. |
| StartDelay | time in seconds | This value sets a delay for the message to appear once the message is triggered. |
| TriggerRegions | array/list | This value sets the trigger for which the message is broadcasted, based on TShock Regions. Here is an external guide for TShock Region Management. |
| RegionTrigger | "all","region","self" | If this value is set, this will broadcast the message to either all players online, all players in the region, or an individual player which has caused the message to trigger. |
| Groups | []/[*]/[playername]/[groupname] |
leaving this value blank restricts actions taken by this message to this user, placing a * encompasses all users. Adding a group's name will leave the group and it's users to be affected by the message. |
| TriggerWords | array/list | List of words typed in chat to trigger this message. |
| TriggerToWholeGroup | true or false | Setting this value as true will send this message to all members of the group who triggered this message. |
Keep in mind: Your message can use commands as well, so these settings are very important if you are making /kick or /ban commands within message triggers.
How to string together multiple messages
To string together multiple messages it's as easy as adding another message to the list, as explained in the code breakdown section, the "Broadcasts" value is a list of multiple messages which are held together, vaguely like this:
{"Broadcasts": [
{ "name" : "Message1", "Enabled": true, ... }, (comma because there's another item in the list) { "name" : "Message2", "Enabled": true, ... } (no comma because I choose to end my list here) ... etc. ] (closes "Broadcasts" list)} (closes AutoBroadcastConfig.json)
That's all you need to know, as long as you can understand this syntax, you can just string together multiple messages forever. Below are some examples of messages taken from the TSchock AutoBroadcast Discussion Forum.
Example messages
As mentioned briefly, you can make your messages use commands. Although this problem won't arise on a GSK TShock Terraria server, we've all experienced this situation: You're just minding your own business, talking to your friends in chat when all of a sudden you hear someone spamming the chat complaining of lag. It's so annoying! Here's an example of a command that will /kills then /kicks players that complain of lag in the chat, created by TShock forum user "Kojiro_S." He makes use of the {player} wildcard, which references the player that triggered the message.
{ "Name": "Lag", "Enabled": true, "Messages": [ "Omae wa mou shindeiru! {player}", "/kill {player}", "/kick {player} zomg lag omg ded!" ], "ColorRGB": [ 255.0, 150.0, 150.0 ], "Interval": 0, "StartDelay": 0, "TriggerRegions": [], "RegionTrigger": "none", "Groups": [ "guest", "default" ], "TriggerWords": [ "Lag", "Laag", "Lagg", "lag", "laag", "lagg", "LAG", "LAAG", "LAGG" ], "TriggerToWholeGroup": false}
Here's another example of a command message from user "Rhapso" on the TShock Forum discussion for AutoBroadcast. This allows all users within the defined groups to type "!torchkit" in the chat, and they will receive 8 Torches. Very useful!
{ "Name": "torchKit", "Enabled": true, "Messages": [ "/give 8 {player} 5" ], "ColorRGB": [ 255.0, 130.0, 0.0 ], "Interval": 0, "StartDelay": 0, "TriggerRegions": [], "RegionTrigger": "none", "Groups": [ "default", "vip", "vip10", "vip20", "supervip", "Administration", "spy", "SA", "superadmin", "Moderator" ], "TriggerWords": [ "!torchkit" ], "TriggerToWholeGroup": false }
Conclusion
In conclusion, we haven't even hit the bottom of the barrel when it comes to things you can do with this plugin. This plugin can be used in so many situations, and since it mirrors a text output out to the console, you can use any command, with any other plugin. You can essentially make your own commands to do whatever you want them to by using this plugin. It is for that reason, GameServerKings will be putting this plugin in our top 5 plugins of 2018 article. As an owner of a TShock Terraria server, this gives you absolutely the most freedom possible when it comes to mixing and matching plugins. You are at the disposal of your creativity with this plugin. It's great!